

This post may contain affiliate links. If you purchase through them, Lilac Pearls may earn a small commission at no extra cost to you.
Empty walls can make a room feel unfinished, but original artwork can be expensive. The good news is that beautiful wall decor doesn’t have to cost much. Paper, paint, fabric scraps, and thrifted frames can all be turned into affordable pieces that add personality to your space.
Below are 25 DIY wall art ideas, each with an estimated cost, time, and difficulty level to help you choose a project that suits your budget and weekend schedule. Most use basic supplies, and many are renter-friendly.
The cheapest DIY wall art ideas cost $0 to $10 and use materials you may already have at home, such as paper, paint chips, old book pages, fabric scraps, and thrifted frames. Five budget-friendly options include paint chip geometric art (free to 3),book page art(0–5),pressed leaf canvas(0–5),an origami paper wreath(0–5),and framed doilies(2–$8).
The costs in this guide are estimates based on typical prices for basic craft supplies. Actual costs may vary depending on the store and your location.
DIY Wall Art Ideas at a Glance
Use this table to compare every idea by cost, time, and difficulty. “Partly” in the last column means the piece is heavier and needs sturdier hanging hardware.
Paper and Print
Book Page Art: 0–5 | 15 minutes | Easy | Renter-friendly: Yes
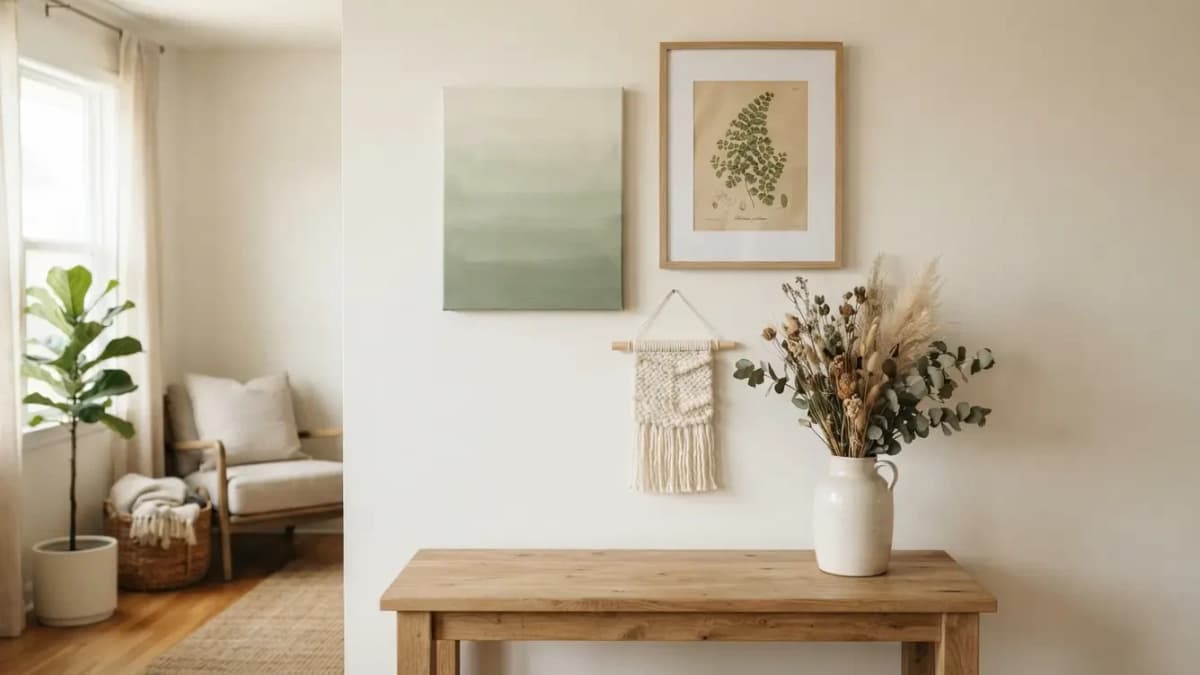
Vintage Botanical Prints: 0–10 | 20 minutes | Easy | Renter-friendly: Yes
Washi Tape Herringbone: 3–8 | 30–45 minutes | Easy | Renter-friendly: Yes
Paint Chip Geometric Art: 0–3 | 30 minutes | Easy | Renter-friendly: Yes
Origami Paper Wreath: 0–5 | 1–2 hours | Medium | Renter-friendly: Yes
Black-and-White Print Gallery Wall: 10–25 | 1 hour | Easy | Renter-friendly: Yes
Paint and Canvas
Ombre Canvas: 8–15 | 1 hour plus drying time | Easy | Renter-friendly: Yes
Mondrian-Style Color Blocks: 8–15 | 1.5 hours | Easy | Renter-friendly: Yes
Textured Canvas: 10–18 | 1 hour plus overnight drying | Easy | Renter-friendly: Yes
Watercolor with Line Art: 5–12 | 45 minutes | Medium | Renter-friendly: Yes
Melted Crayon Art: 5–12 | 30 minutes | Medium | Renter-friendly: Yes
Brush-Lettered Canvas: 5–12 | 45 minutes | Medium | Renter-friendly: Yes
Fabric and Yarn
Rug or Fabric Wall Tapestry: 10–25 | 20 minutes | Easy | Renter-friendly: Partly
Framed Doilies: 2–8 | 30 minutes | Easy | Renter-friendly: Yes
Yarn Wall Hanging: 5–10 | 1 hour | Easy | Renter-friendly: Yes
Mini Weave: 5–12 | 1–2 hours | Medium | Renter-friendly: Yes
Simple Macramé Hanging: 8–18 | 1–2 hours | Medium | Renter-friendly: Yes
Natural and Found Objects
Cork Tile Geometric Art: 5–12 | 45 minutes | Easy | Renter-friendly: Yes
Cork World Map: 10–20 | 1.5 hours | Medium | Renter-friendly: Yes
Pressed Leaf Canvas: 0–5 | About 1 week for pressing, plus 20 minutes for assembly | Easy | Renter-friendly: Yes
Woven Basket Wall Display: 10–25 | 20 minutes | Easy | Renter-friendly: Yes
Thrift Store Frames and Objects
Open Frames Gallery Wall: 5–15 | 30 minutes | Easy | Renter-friendly: Yes
Collected Shadow Box: 5–15 | 30 minutes | Easy | Renter-friendly: Partly
Scrabble Tile Word Art: 5–12 | 45 minutes | Easy | Renter-friendly: Yes
Placemat Art: 2–8 | 15 minutes | Easy | Renter-friendly: Yes
Basic Supplies Worth Having (Around $15 or Less)
Many of these projects use the same tools, so a small starter kit can cover most of the list. Buy only what you need for the projects you plan to make.
Acrylic paint set (primary colors, white, and black): Useful for canvas projects. Look for a set with at least eight colors so you can mix different shades. [AFFILIATE LINK]
Painter’s tape: Helps create clean edges for color blocks and herringbone designs. Low-tack tape is gentler on canvas. [AFFILIATE LINK]
Craft glue and a mini glue gun: Craft glue works well for paper, while a glue gun is useful for cork, wood, and heavier materials. [AFFILIATE LINK]
Removable adhesive strips and hooks: Helpful for renters who want to hang art without drilling holes. Check each product’s weight limit before hanging anything. [AFFILIATE LINK]
A pencil, ruler, and scissors complete the kit. If you already have these basics, you may only need to buy paint and glue.
Paper and Print Wall Art Ideas ($0–$25)
Paper is the lowest-cost material on this list, and it works well when the framing is consistent. These projects suit beginners and take little time.
Book Page Art
Cost: $0–$5 | Time: 15 minutes | Difficulty: Easy
You’ll need: An old or damaged book, a frame, and a neutral mat or cardstock backing.
How it works: Choose pages with a simple layout, such as a chapter opening or a small illustration. Trim the page to fit the frame, press it flat under a heavy book overnight, and mount it on cardstock to help prevent curling. Use a worn-out book rather than cutting up a good copy.
Vintage Botanical Prints
Cost: $0–$10 | Time: 20 minutes | Difficulty: Easy
You’ll need: Free public-domain botanical illustrations, matte paper, and thrifted frames.
How it works: Find botanical illustrations in museum open-access collections, such as the Met, the Smithsonian, or the Biodiversity Heritage Library. These resources offer images you can download for free, but check the usage terms for each image before printing. Print three illustrations on matte paper at home or at a print shop, then arrange them in a row for a cohesive look.
Washi Tape Herringbone
Cost: $3–$8 | Time: 30–45 minutes | Difficulty: Easy
You’ll need: Washi tape in one or two colors, a canvas or foam board, a ruler, and scissors.
How it works: Mark a vertical center line in pencil, then apply tape strips at alternating angles to create a V-shaped pattern. Trim the ends neatly along the edges. Using a canvas or foam board instead of applying tape directly to the wall makes the artwork easy to move, while a two-color palette creates a more cohesive look.
Paint Chip Geometric Art
Cost: $0–$3 | Time: 30 minutes | Difficulty: Easy
You’ll need: Free paint chips, craft glue, a canvas or cardstock, and scissors.
How it works: Collect paint chips from the same color family, cut them into triangles or squares, and arrange them from light to dark before gluing them in place. Lay out the pieces first to check for gaps and keep the spacing even. Many hardware stores offer paint chips for free, though availability and policies vary.
Origami Paper Wreath
Cost: $0–$5 | Time: 1–2 hours | Difficulty: Medium
You’ll need: Patterned or scrap paper, a cardboard ring cut from a shipping box, and glue.
How it works: Fold the paper into the same simple shape repeatedly, such as a pinwheel or leaf, then glue the pieces around the ring in overlapping layers. Keeping each piece a similar size creates a neat, balanced look without complicated folding. Since the finished wreath is lightweight, a small adhesive hook may be enough to hang it.
Black-and-White Print Gallery Wall
Cost: $10–$25 | Time: 1 hour | Difficulty: Easy
You’ll need: Six to nine prints of landscapes, architecture, or nature, matching frames, and access to a printer or print shop.
How it works: Convert images you own or have permission to use to black and white, print them in a few consistent sizes, and place them in frames of the same color. Black and white helps unify pictures with different subjects. Trace each frame onto paper, tape the templates to the wall, and adjust the layout before making any holes.
Paint and Canvas Wall Art Ideas (5–18)
Painted artwork can look custom because you can choose colors that complement your room. A small canvas and a few paints are enough for most of these projects. For inspiration, explore these [neutral color palettes for small rooms] [INTERNAL LINK].
Ombre Canvas
Cost: $8–$15 | Time: 1 hour plus drying | Difficulty: Easy
You’ll need: A canvas, one acrylic paint color, white paint, and a wide brush.
How it works: Create four or five shades of the same color by gradually adding more white. Paint horizontal bands from darkest to lightest, blending the edges while the paint is still wet. Using a single color family creates a cohesive look that works well with most room palettes.
Mondrian-Style Color Blocks
Cost: $8–$15 | Time: 1.5 hours | Difficulty: Easy
You’ll need: A canvas, painter’s tape, and acrylic paint in three or four colors.
How it works: Use painter’s tape to create a grid of uneven rectangles. Paint selected blocks with color, leaving others white. Once the paint is dry to the touch, peel off the tape. Classic primary colors can feel bold in a calm room, so consider softer shades like sage, clay, and cream. Press the tape edges down firmly to keep the lines crisp.
Textured Canvas
Cost: $10–$18 | Time: 1 hour plus overnight drying | Difficulty: Easy
You’ll need: A canvas, joint compound or spackle, a putty knife, and wall paint or acrylic paint in a neutral shade.
How it works: Spread a thin layer of compound across the canvas using sweeping strokes. Let it dry completely, then paint over it in a single neutral color. The raised texture catches the light and adds depth without introducing extra colors. Avoid sanding to prevent creating fine dust.
Watercolor with Line Art
Cost: $5–$12 | Time: 45 minutes | Difficulty: Medium
You’ll need: Heavyweight watercolor paper, a watercolor set, a fine black pen, and a frame.
How it works: Paint loose washes using two or three colors and let them dry completely. Then draw a continuous line or a simple botanical outline over the painted areas. Paper weighing around 140 lb (300 gsm) helps resist buckling. A generous mat can also make a small artwork look more substantial inside its frame.
Melted Crayon Art
Cost: $5–$12 | Time: 30 minutes | Difficulty: Medium
You’ll need: A canvas, crayons, hot glue or strong craft glue, and a hair dryer.
How it works: Glue the crayons along the top edge of the canvas, then stand it upright over a protected surface. Use a hair dryer on medium heat to melt the crayons, allowing the wax to flow downward. Handle the melted wax carefully, as it can be hot. Stick to two or three colors for a cleaner, more modern look.
Brush-Lettered Canvas
Cost: $5–$12 | Time: 45 minutes | Difficulty: Medium
You’ll need: A canvas, acrylic paint, a round brush, and a pencil.
How it works: Choose a word, such as “gather” or “home,” and sketch it lightly in pencil. Paint the lettering using thick downstrokes and thin upstrokes. Practice on scrap paper first to get comfortable with the brush. A single word on a plain background creates a clean, calming look.
Fabric and Yarn Wall Art Ideas (2–25)
Textiles add softness and warmth, especially in rooms with hard surfaces. Thrift stores are great places to find affordable rugs, doilies, and fabric lengths for wall art projects.
Rug or Fabric Wall Tapestry
Cost: $10–$25 | Time: 20 minutes | Difficulty: Easy
You’ll need: A thrifted flat-weave rug or fabric length, a wooden dowel or curtain rod, and clips or hooks.
How it works: Attach the textile to a dowel using clips or a sewn pocket, then hang it from two sturdy hooks. Since this is one of the heaviest projects on the list, choose hooks rated for the textile’s weight or secure them to a wall stud where your lease allows.
Framed Doilies
Cost: $2–$8 | Time: 30 minutes | Difficulty: Easy
You’ll need: Vintage doilies, frames, and dark fabric or paper for the backing.
How it works: Press each doily flat, then mount it against a dark background to highlight the lace pattern. Secure it with a few small stitches or acid-free tape. Grouping three framed doilies in different sizes creates a balanced display above a console table.
Yarn Wall Hanging
Cost: $5–$10 | Time: 1 hour | Difficulty: Easy
You’ll need: Scrap yarn, a stick or dry branch, and scissors.
How it works: Cut the yarn into equal lengths, fold each piece in half, and attach it to the stick using a lark’s head knot. Layer two or three shades to add depth, then trim the bottom straight or at an angle. If you use a branch from outdoors, make sure it is completely dry before using it.
Mini Weave
Cost: $5–$12 | Time: 1–2 hours | Difficulty: Medium
You’ll need: A piece of cardboard, yarn, scissors, and a dowel.
How it works: Cut small notches along the top and bottom edges of the cardboard, then wind the vertical threads between them to create a simple loom. Weave the yarn over and under using your fingers or a fork. Cut the threads at the bottom, tie them off, and attach the finished piece to a dowel. A 6-by-8-inch weave is a manageable size for a first project.
Simple Macramé Hanging
Cost: $8–$18 | Time: 1–2 hours | Difficulty: Medium
You’ll need: Cotton cord (3–5 mm thick), a dowel, and scissors.
How it works: Attach the cords to the dowel using lark’s head knots, then tie rows of square knots to create the pattern. Trim the fringe evenly for a neat finish. A simple square-knot design can look beautiful on its own, and one roll of cord may be enough for several projects.
Natural and Found-Object Wall Art Ideas ($0–$25)
Cork, leaves, and baskets bring natural texture to a wall at a low cost. They suit neutral and earthy palettes especially well.
Cork Tile Geometric Art
Cost: $5–$12 | Time: 45 minutes | Difficulty: Easy
You’ll need: cork sheet or tiles, a craft knife, glue, a frame or board.
How it works: Cut the cork into triangles, hexagons, or rectangles and arrange them in a pattern before gluing. The warm tone suits neutral rooms and adds texture without paint. Use a sharp blade and a cutting mat, and always cut away from your hand.
Cork World Map
Cost: $10–$20 | Time: 1.5 hours | Difficulty: Medium
You’ll need: a cork sheet or board, a printed map outline, a craft knife, pins.
How it works: Trace a world map outline onto the cork, cut along the lines, and mount the shape on a contrasting board. Pins can mark places you have visited or hope to see, which makes it a keepsake as well as decor.
Pressed Leaf Canvas
Cost: $0–$5 | Time: About 1 week pressing, plus 20 minutes | Difficulty: Easy
You’ll need: fresh leaves, heavy books, a painted canvas, decoupage medium.
How it works: Press leaves between sheets of paper under a heavy book for seven to ten days, then arrange them on a painted canvas and seal with a thin coat of decoupage medium. Thin leaves press flat more easily than thick ones.
Woven Basket Wall Display
Cost: $10–$25 | Time: 20 minutes | Difficulty: Easy
You’ll need: three to five flat baskets in different sizes, small nails or removable hooks.
How it works: Thrift stores often stock baskets at low prices. Arrange them on the floor first, then hang them in an odd-numbered group with a balanced mix of sizes. Natural fiber adds warmth, and the baskets are lightweight.
Thrift Store Frame and Object Ideas ($2–$15)
Thrift stores often sell frames and small objects for a few dollars. A little paint or careful grouping makes them look deliberate.
Open Frames Gallery Wall
Cost: $5–$15 | Time: 30 minutes | Difficulty: Easy
You’ll need: thrifted frames, spray paint (optional), hanging hardware.
How it works: Remove the glass and backing, paint the frames one color if they do not match, and hang them empty so the wall shows through. Over a painted or textured wall, the frames become the art. Keep about 2 to 3 inches between them for a tidy arrangement.
Collected Shadow Box
Cost: $5–$15 | Time: 30 minutes | Difficulty: Easy
You’ll need: a deep frame or shadow box, small natural or fabric items, glue or pins, a fabric backing.
How it works: Choose objects that share a color, such as shells, dried stems, and fabric swatches, and arrange them on the backing before securing each piece. Leave open space so it does not look crowded. Deeper boxes can be heavy, so check the hanging hardware.
Scrabble Tile Word Art
Cost: $5–$12 | Time: 45 minutes | Difficulty: Easy
You’ll need: letter tiles from a thrifted game set, a painted board or canvas, strong glue.
How it works: Spell a short word, space the tiles evenly with a ruler, and glue them in place. A dark board makes light tiles stand out. Check that the set has the letters you need before you start, since each letter is limited.
Placemat Art
Cost: $2–$8 | Time: 15 minutes | Difficulty: Easy
You’ll need: patterned or woven placemats, frames, removable hooks.
How it works: Choose flat placemats with a pattern or woven texture, trim them to fit a frame if needed, and hang them alone or as a set of three. At a few dollars each, they add pattern and texture quickly. Check the color against your wall before buying a full set.
How to Make DIY Wall Art Look Expensive
The difference between handmade art and a polished-looking piece often comes down to presentation. These five tips can help inexpensive artwork look more intentional.
Match your frames. A single coat of spray paint can bring frames from different sources together.
Add a wide mat. Extra white space around the artwork creates a gallery-like look, even when the design is simple.
Limit your palette. Using two or three colors across a group of pieces creates a more cohesive look.
Choose a larger scale. One larger piece can make a stronger visual impact than several small ones.
Pay attention to height and spacing. A common guideline is to hang artwork with its center around 57 inches (145 cm) from the floor, leaving 2 to 3 inches between frames in a group. Adjust these measurements to suit your ceiling height, furniture, and available wall space. [INTERNAL LINK: gallery wall layout ideas]
How to Hang DIY Wall Art Without Damaging Walls
For renters, removable adhesive strips or hooks can be a good option for lightweight artwork. Choose products rated for your piece's weight and apply them to a clean, dry wall surface as directed. Always check the package for weight limits and surface requirements, as these vary by product. [INTERNAL LINK: how to hang pictures without nails]
Lightweight pieces (paper art, small canvases, washi tape boards): Removable adhesive strips are often suitable when used according to the manufacturer's instructions.
Medium-weight pieces (framed prints, baskets): Use appropriately rated removable hooks or picture-hanging nails if your lease allows small holes.
Heavy pieces (rug tapestries, deep shadow boxes): Choose hooks or anchors rated for the full weight, preferably secured into a wall stud when appropriate.
Before making any holes, trace each piece onto paper, tape the templates to the wall, and adjust the arrangement until it looks balanced.
Frequently Asked Questions
What is the cheapest way to make wall art?
One of the cheapest options is to use materials you already have or can get for free, such as paint chips, old book pages, or public-domain prints, and display them in a thrifted frame. These projects can cost $0 to $10 and often take less than an hour.
Can I make DIY wall art without painting?
Yes. Book page art, washi tape herringbone, yarn hangings, framed doilies, placemat art, cork tiles, pressed leaves, and woven basket displays are all options that don't require painting.
What can I use instead of a frame?
A wooden dowel works well for textile hangings, while canvas or foam board can support paper art. Fabric can also be displayed with suitable hooks and clips, and open thrifted frames can serve as decorative pieces on their own.
How do I make cheap wall art look expensive?
Choose matching frames, add wide mats, stick to two or three colors, consider larger artwork, and space pieces evenly. Thoughtful presentation can make even inexpensive materials look polished.
What is the easiest DIY wall art for beginners?
Paint chip geometric art, book page art, framed doilies, and placemat art are beginner-friendly options. Most take 30 minutes or less, depending on the materials and preparation.
How long does DIY wall art take?
Most projects take 15 minutes to 2 hours of active work. Painted pieces may need additional drying time, while pressed leaf art requires about a week for the leaves to dry flat before assembly.
What DIY wall art is renter-friendly?
Lightweight projects, such as paper art, small canvases, yarn hangings, and lightweight basket displays, can often be hung with suitable removable adhesive strips or hooks. Heavier pieces require hardware rated for their weight and may need a more secure installation.
Final Thoughts
Affordable DIY wall art is easier to approach when you start with a simple project. Paint chip art, book page art, and framed doilies are good starting points because they use inexpensive materials and can often be completed in under an hour.
Choose one idea, gather the supplies you need, and see how it looks on your wall before moving on to a larger project. For more budget-friendly inspiration, explore other decorating ideas on Lilac Pearls.


